Appearance
Klaviyo email integration
By default, Garnet uses its own templates to send emails to vendors. Using the Klaviyo integration enables the marketplace to collect Garnet's events that you can configure to trigger email workflows.
Klaviyo email integration is available for the marketplace using the Integrated Plan.
Generate an API Key
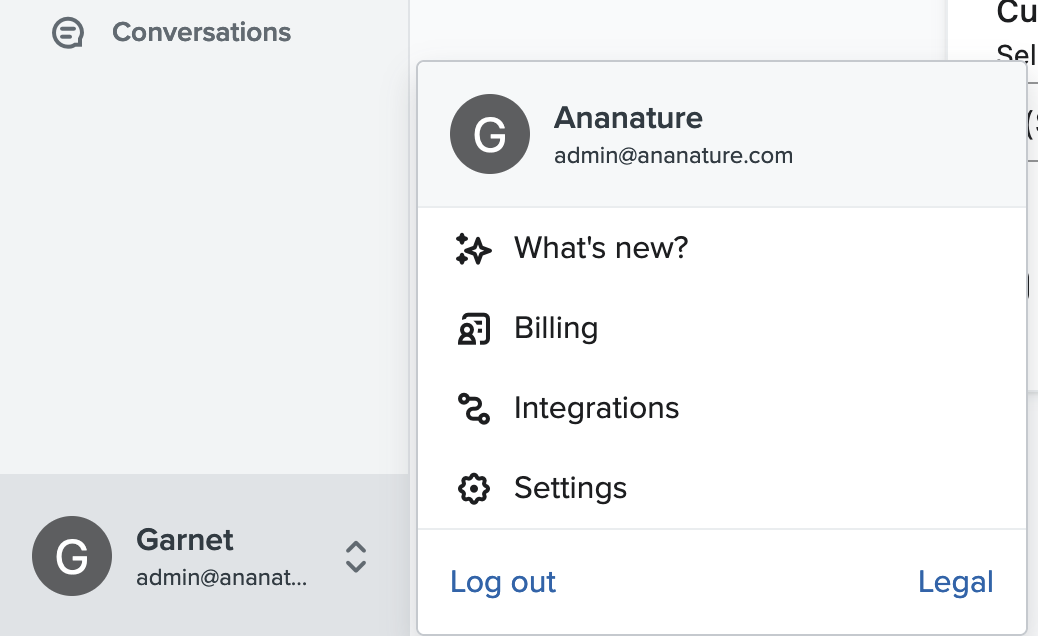
Garnet needs to be able to push events to your Klaviyo account. To do this, create an API key with full access to events. Go to Klaviyo > bottom right > Settings.
On the settings page, navigate to Accounts > API Keys > Create Private API Keys and create a new API key named Garnet emails with the access level Custom Key and the permission Events: Full Access.

Once saved, send us the API key (it looks like pk_123...) and your store name. We will notify you once the setup has been completed within two working days.
Setup your first email
After the setup is completed, you will find in Klaviyo > Analytics > Metrics new events:
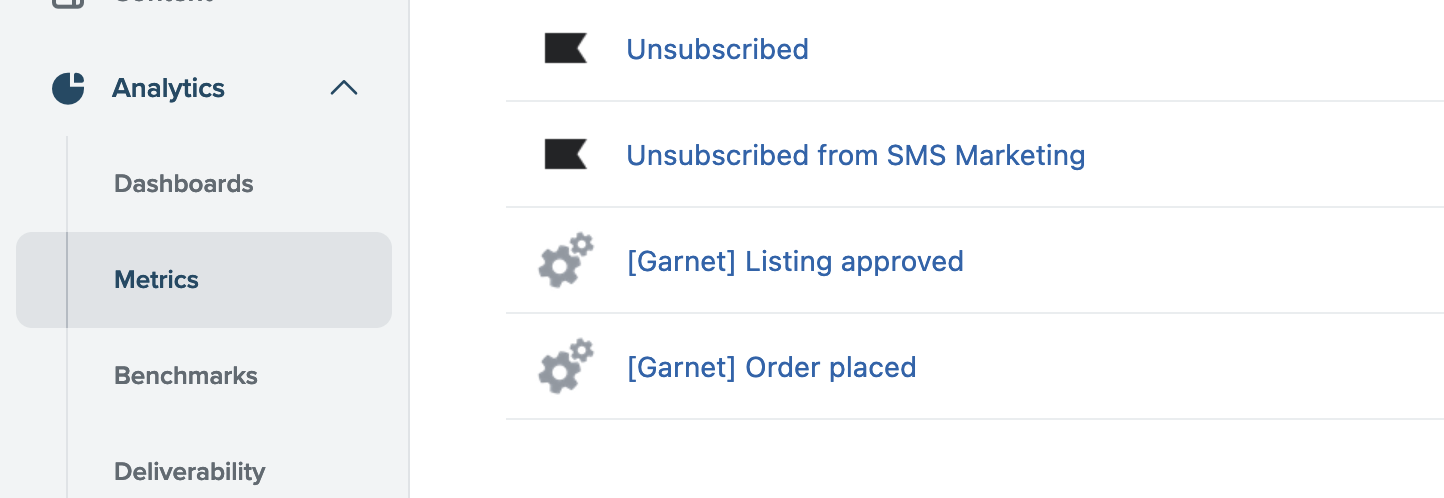
Available events
All events below can be received in Klaviyo. To trigger them, send a test email from Admin Panel > Notifications.
| Event name | Type | Data available |
|---|---|---|
auth-change-password | Authentication | Authentication code |
auth-invite | Authentication | Authentication code |
auth-verify | Authentication | Authentication code |
order-placed | Order | Shopify order object |
order-reminder-1 | Order | Shopify order object |
order-reminder-2 | Order | Shopify order object |
order-reminder-3 | Order | Shopify order object |
product-approved | Product | Shopify product object |
vendor-new-message | Communication | Last 5 messages of the conversation, type of recipient |
auth-invite | Vendor | Vendor and vendor details |
vendor-pending-approval | Vendor | Vendor and vendor details |
Note that emails sent to the marketplace are still sent by our email provider.
Create an email template
Now that everything is set up correctly on Garnet's side, we'll create the email template to be sent. Here we'll create a template that will be triggered by the event [Garnet] Product approved.
Go to Klaviyo > Content > Template and create a new template, either from the library or from scratch.
Below is a template we created using the variable inside the template. You can see such preview in Preview & test > Events (on the right) > select [Garnet] Product approved.
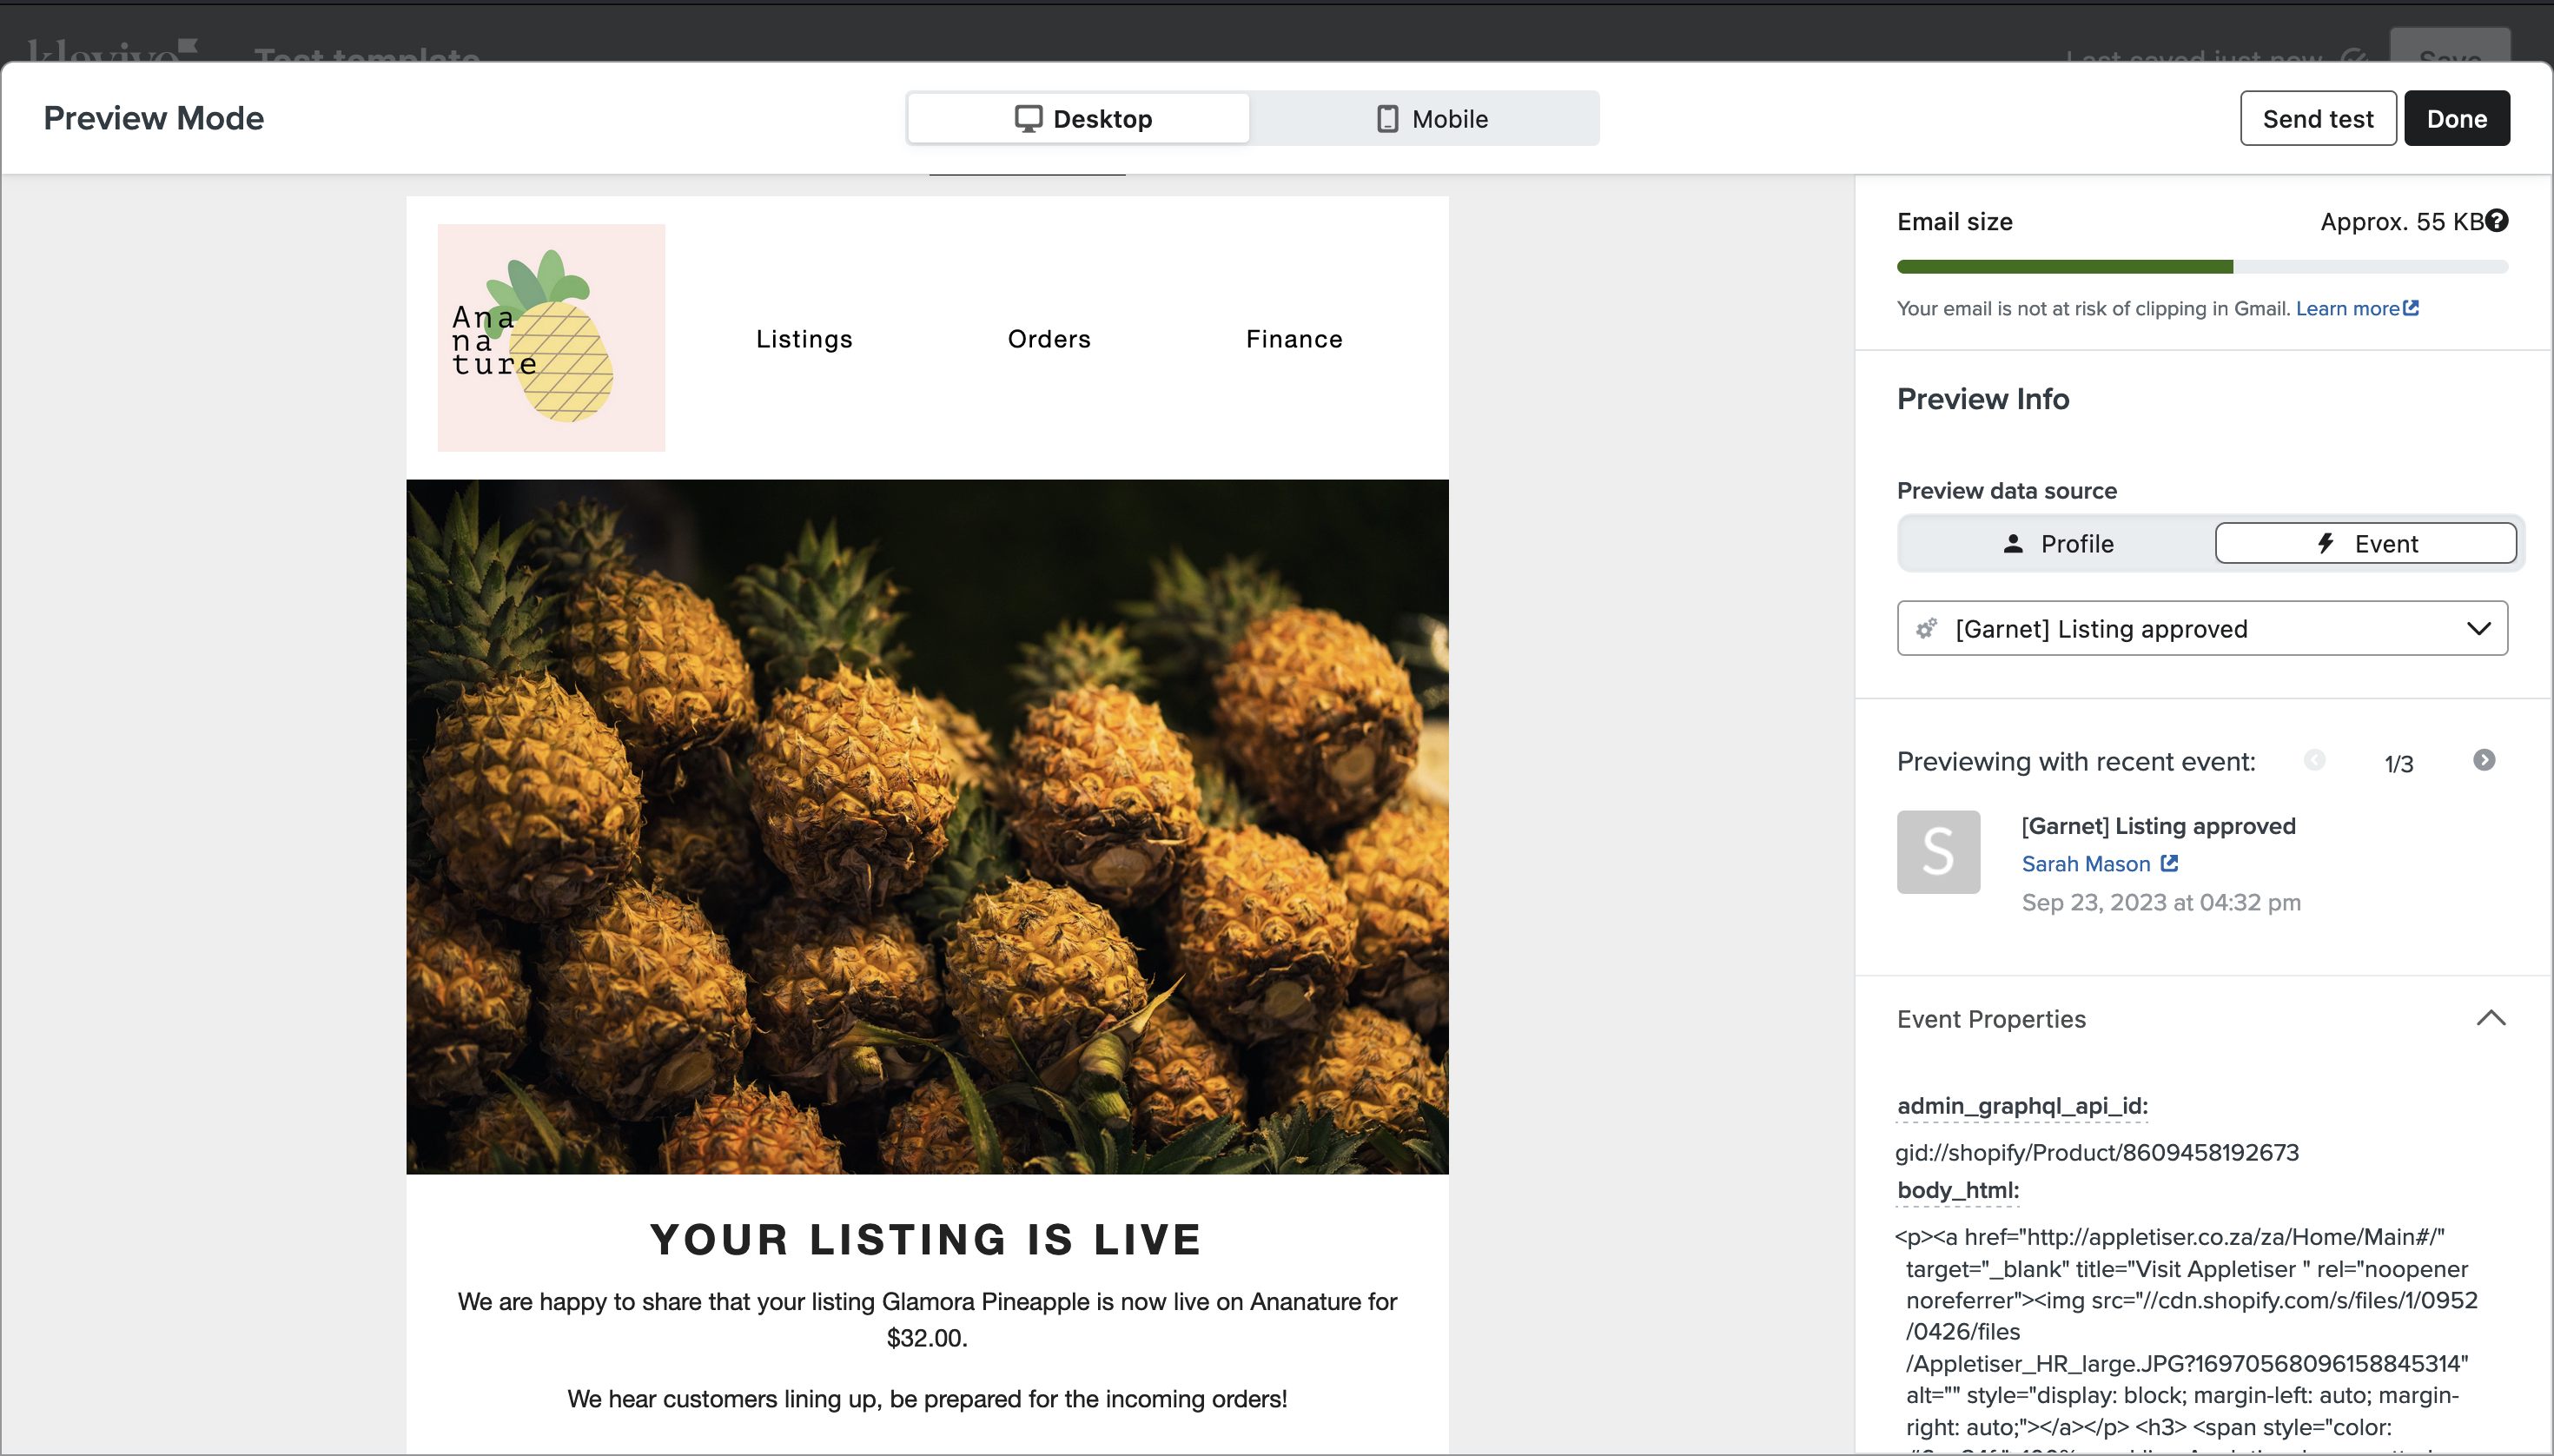
Here is how we wrote the text below the image:
text
We are happy to share that your listing {{ event.title }} is now live
on Ananature for ${{ event.variants.0.price }}.
You have access to all the content of the product, you can let your creativity go wild.
You can find more documentation on how to use variables inside the template in Klaviyo's documentation.
Data sample
js
{
  "product-approved": "// Shopify product",
  "vendor-new-message": {
    "conversation": {
      "product": "// Shopify product",
      "conversationId": "1prpoqx",
      "messages": [
        {
          "createdAt": "2025-01-15T08:01:56.393Z",
          "from": "8392655503649",
          "text": "Hey, I am interested in this bag",
          "readAt": "2025-01-15T08:02:37.241Z"
        },
        {
          "createdAt": "2025-01-15T08:02:42.718Z",
          "from": "Asian Crowns",
          "text": "Sure here are more pictures",
          "readAt": "2025-01-15T08:02:49.306Z"
        },
        {
          "createdAt": "2025-01-22T16:24:59.410Z",
          "image": "https://cdn.garnet.center/messages/ananature2/262436903486-sgcw5e.jpg",
          "from": "Asian Crowns",
          "text": ""
        },
        {
          "createdAt": "2025-01-22T16:25:17.583Z",
          "from": "Asian Crowns",
          "text": "It is available for collection from Sunmday onward."
        },
        {
          "createdAt": "2025-01-22T16:25:22.454Z",
          "from": "Asian Crowns",
          "text": "Sunday*"
        }
      ],
      "store": "ananature2",
      "ctas": [],
      "esIndexKey": "ananature2#1prpoqx",
      "participants": [
        {
          "vendor": "8392655503649",
          "name": "Marcus Arman",
          "email": "one@garnet.center"
        },
        {
          "vendor": "Asian Crowns",
          "name": "Asian Crowns",
          "email": "two@garnet.center"
        }
      ]
    },
    "sendEmailTo": "test-email-template@garnet.center",
    "isCustomer": false,
    "sendToVendor": "Asian Crowns"
  },
  "vendor-rejection": {
    "createdAt": ""
  },
  "order-placed": "// Shopify order",
  "order-reminder-1": "// Shopify order",
  "order-reminder-2": "// Shopify order",
  "order-reminder-3": "// Shopify order",
  "vendor-pending-approval": {
    "createdAt": "",
    "email": "info@asiancrowns.com",
    "fields": [
      {
        "key": "",
        "name": "Company name",
        "value": "Asian Crowns"
      },
      {
        "key": "",
        "name": "Annual revenues",
        "value": "5M"
      }
    ],
    "store": ""
  },
  "auth-change-password": {
    "code": "JC39L",
    "vendor": "Asian Crowns",
    "email": "info@asiancrowns.com"
  },
  "auth-invite": {
    "code": "JC39L",
    "vendor": "Asian Crowns",
    "email": "info@asiancrowns.com"
  },
  "auth-verify": {
    "code": "JC39L",
    "vendor": "Asian Crowns",
    "email": "info@asiancrowns.com"
  }
}
Create the flows
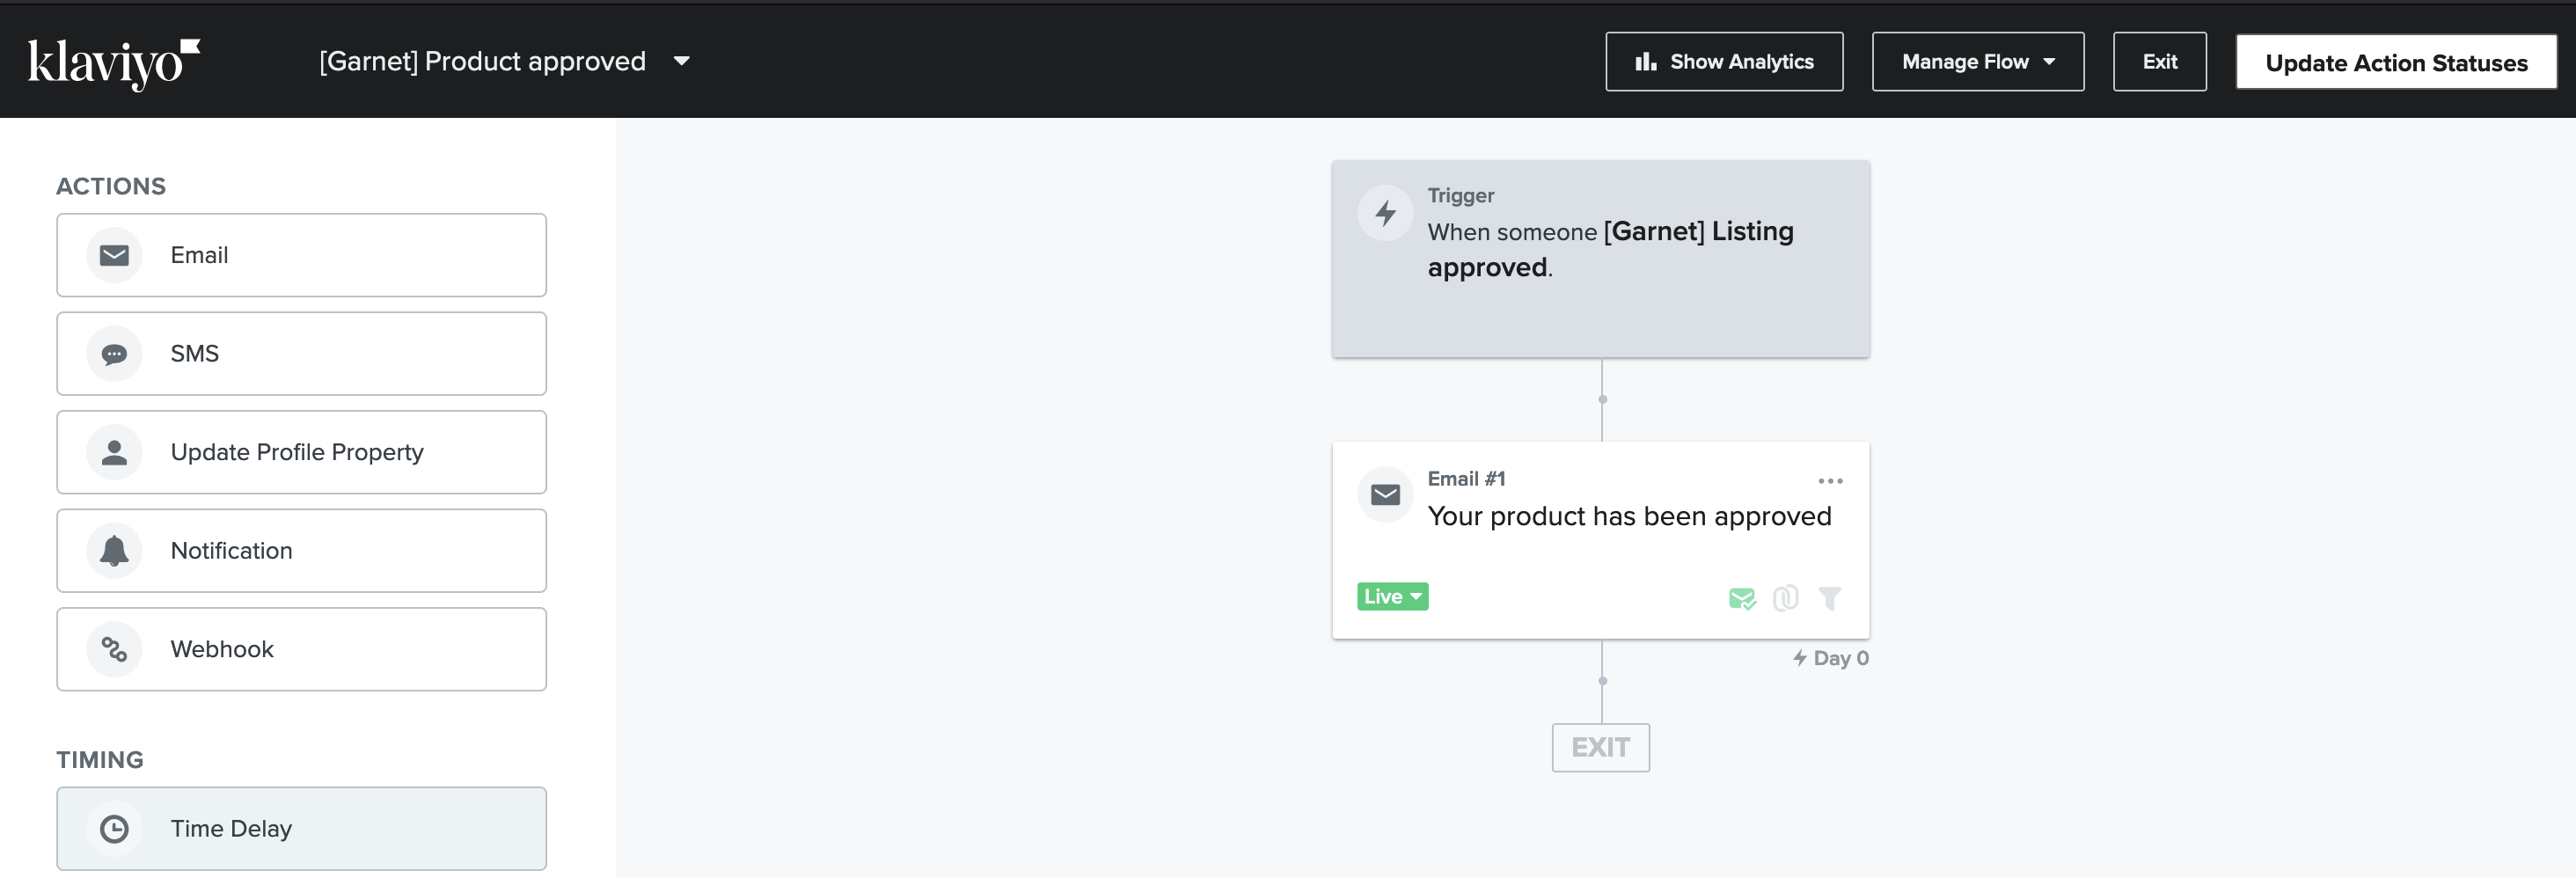
Great, the events and the template are here. Let's wire them together. Go to Klaviyo > Flows > Create Flows, you can create one from a template or from scratch. Here we created a flow from scratch named [Garnet] Product approved.
- As a trigger, use the desired metric,
[Garnet] Product approvedin our case. - Add an email block below, edit it, fill in the subject and click on
Drag and Dropto import the template you created. - Save and turn on the template. In the end it should look as follows:
Test, iterate, and enjoy !
Your setup is completed, you can test it out by creating a new vendor on your store with your email address, submit a product, and approve it as an admin.
Look, I got mine: 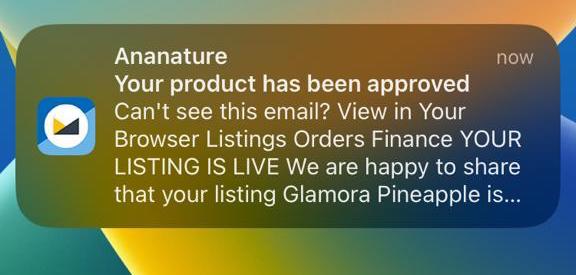
Looking for another integration?
Don't hesitate to request an integration.