Appearance
Install Shopify integration
For vendors handling their products and orders on Shopify: instead of doing countless CSV exports/imports, you can use the Garnet Seller sales channel to have real-time integration with Garnet with no effort.
Integration scope
- ✅ Easy install with Garnet Seller
- ✅ Product synchronization
- ✅ Order synchronization
- ✅ Fulfillment status
- ✅ Tracking synchronization
Garnet Seller
Garnet Seller integrates gracefully with other applications. So if the vendor uses fulfillment or product management apps, it will still work.

Garnet Seller allows synchronizing seamlessly with Garnet Marketplace the following:
- Orders: when the marketplace receives an order, it is forwarded to the vendor.
- Products: when the vendor updates a product, it is reflected on Garnet and, if approved, on Shopify.
- Trackings: when the vendor fulfills an order, the marketplace receives the tracking.
1. The marketplace gives the integration key
The marketplace admin can access the Integration details by going to Settings > Integration > Shopify integration. From here you can copy the integration key and send it to the vendor.
Note that you can easily create an email for the vendor by using the button Draft email for the vendor that makes a draft email with the vendor email address, a subject, and a body.

2. The vendor installs Garnet Seller
The vendor must download the Garnet Seller app on the app store (free for the vendor).

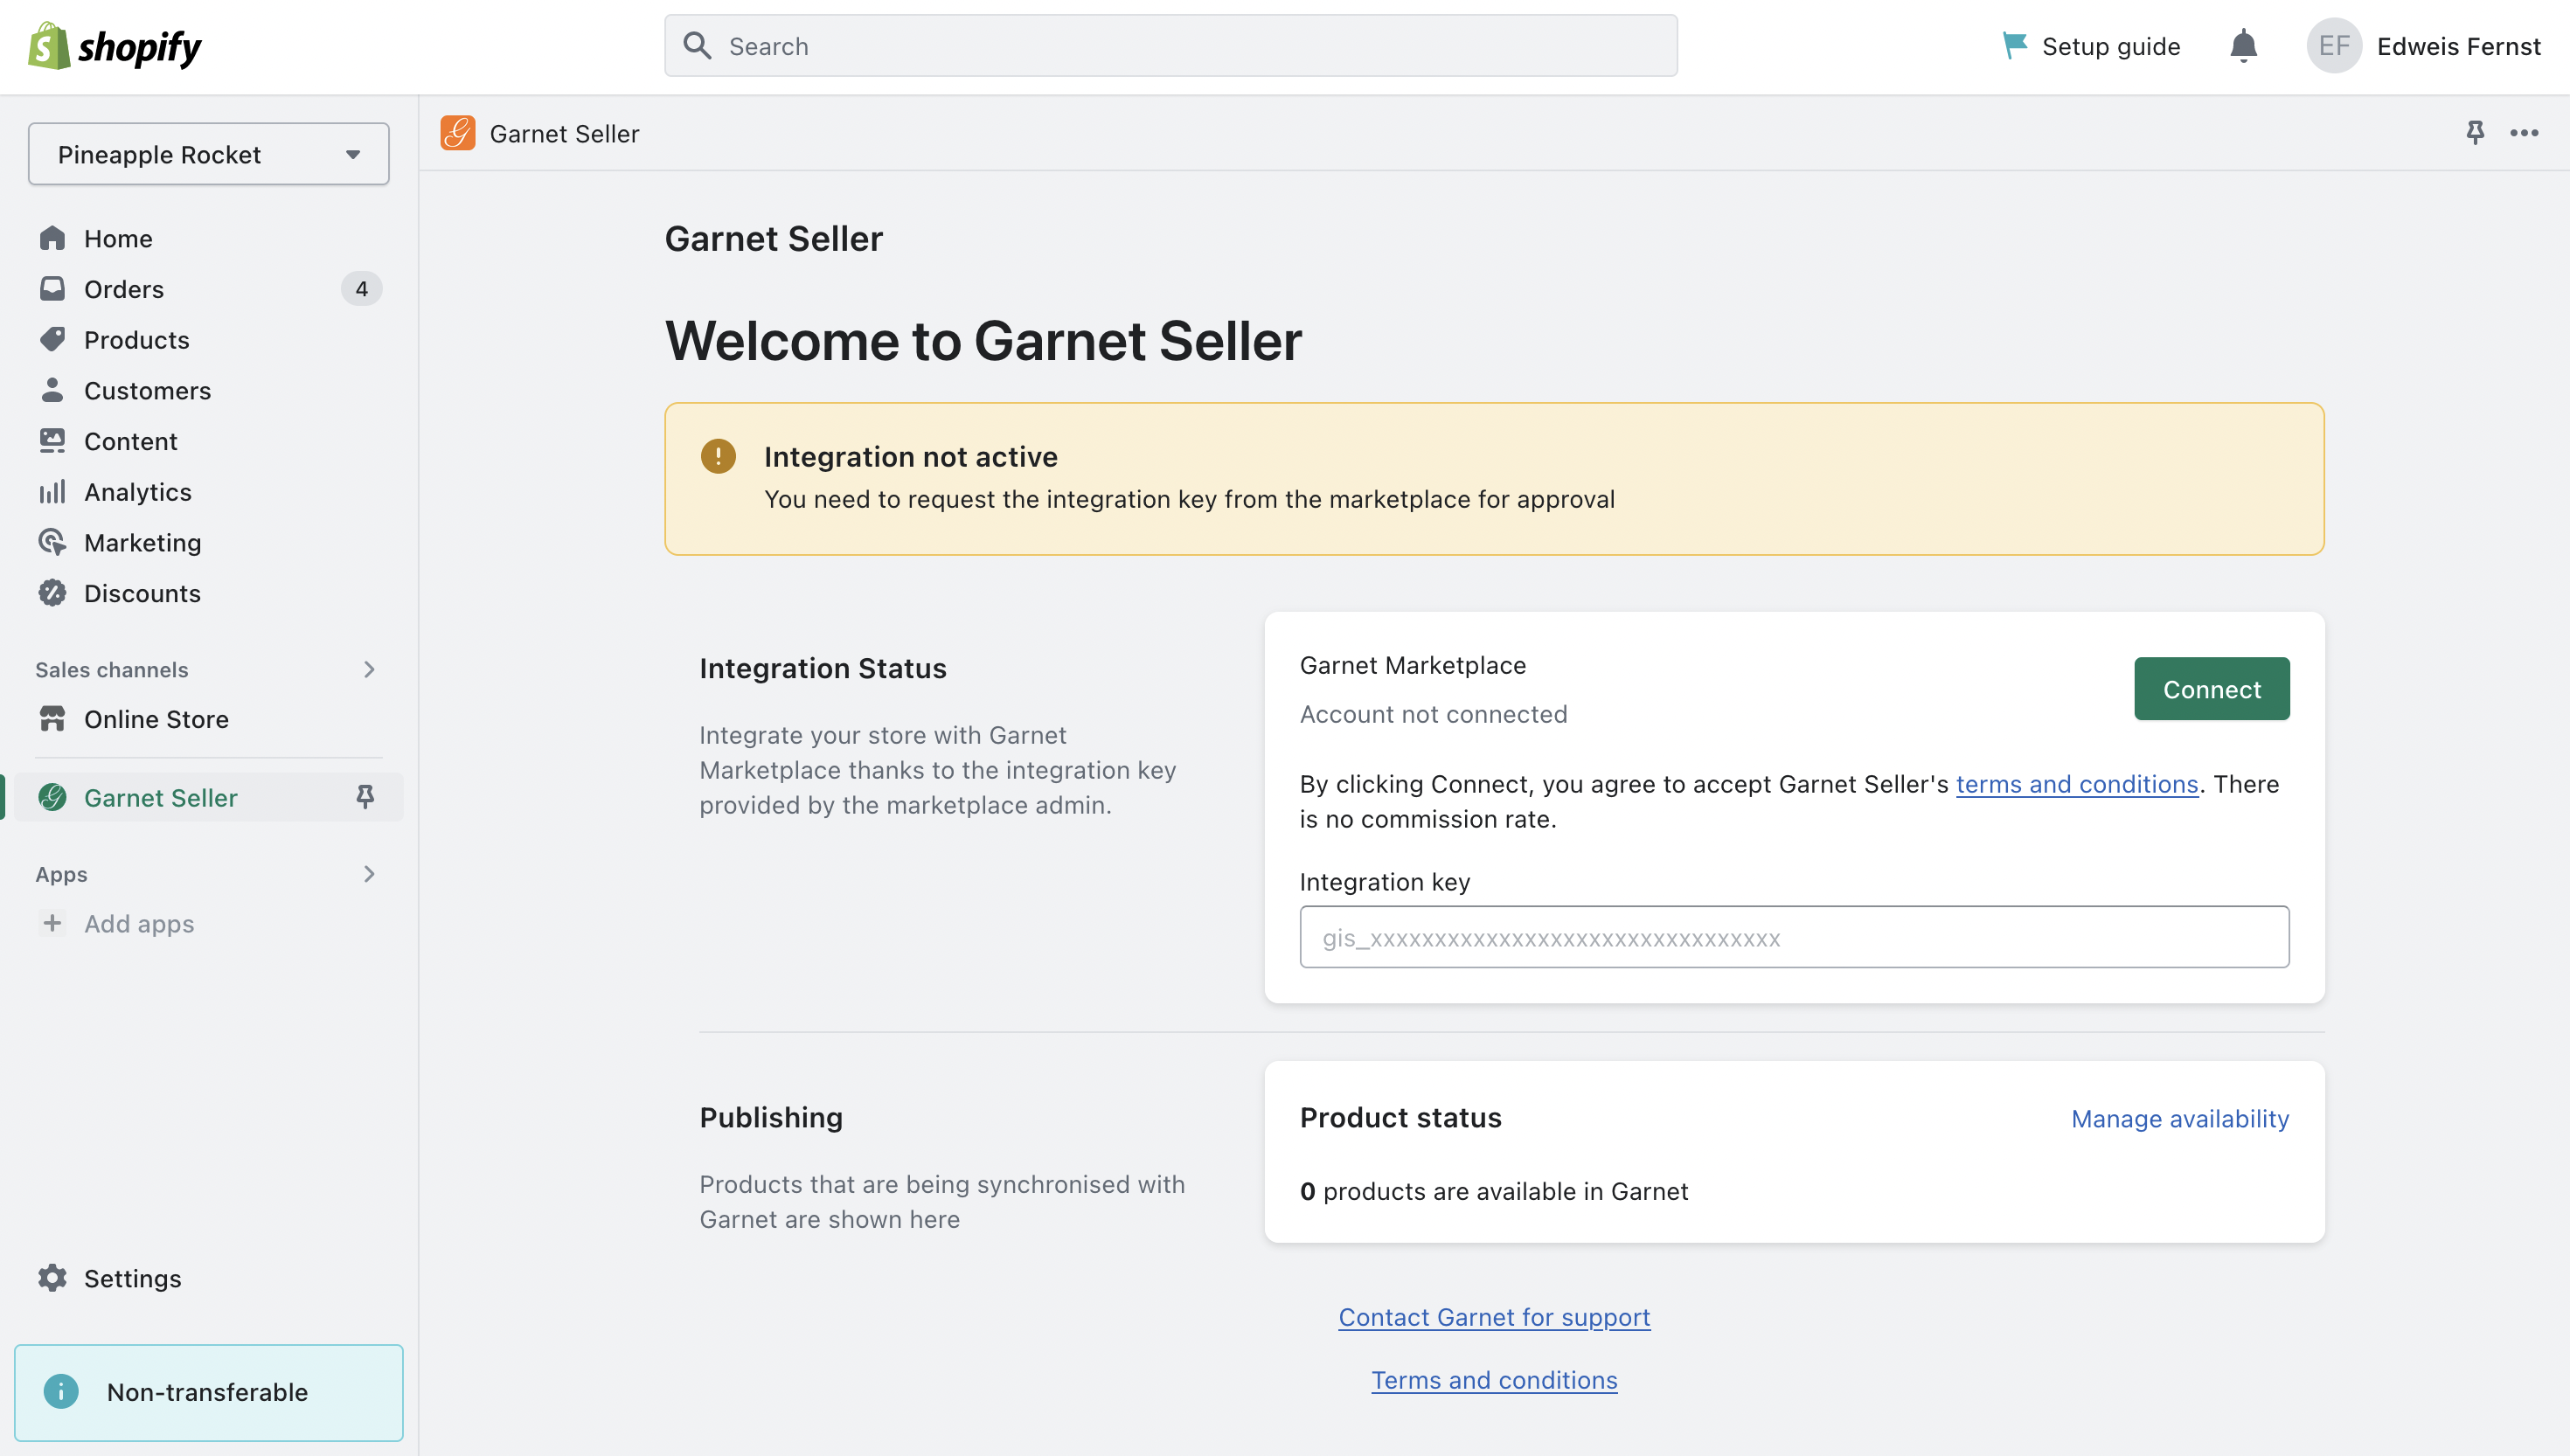
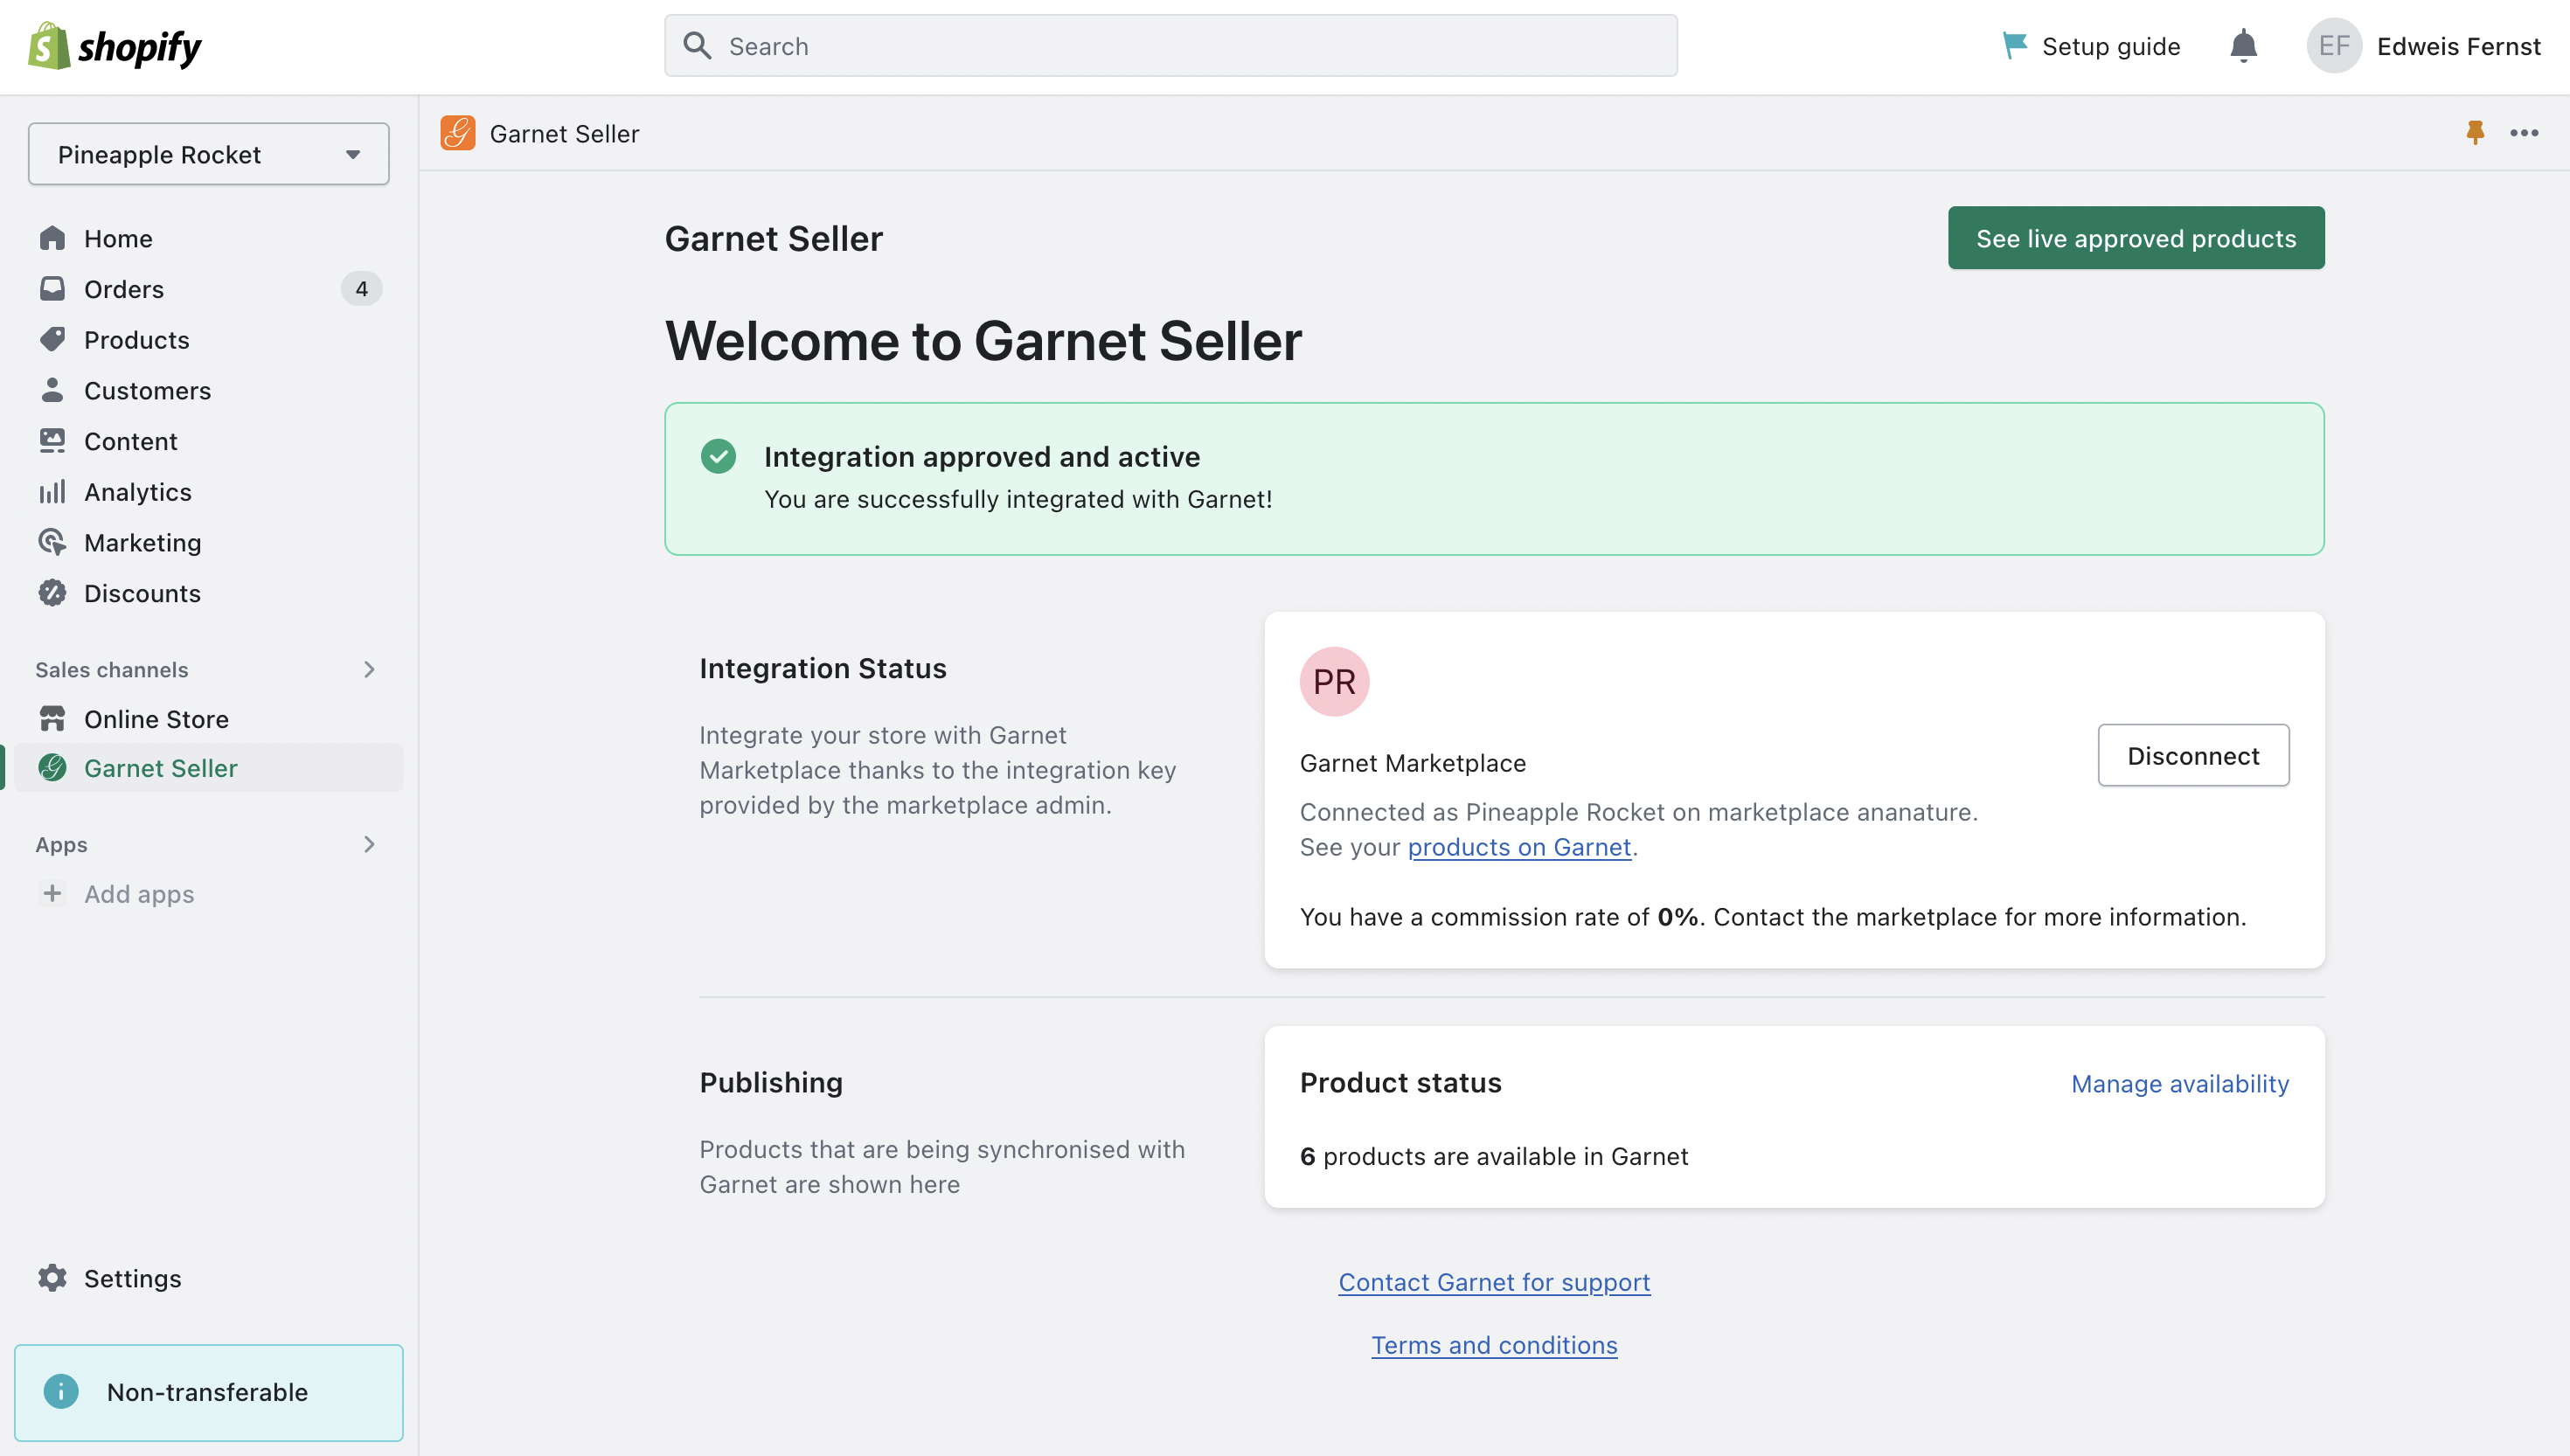
Once installed, the vendor has access to the following interface. They can paste the integration key and click Connect. The app will then look like this:

From there, the vendor can see the number of products synchronized. They can click on Manage availability to select which product they want to share with the marketplace.
Moreover, a vendor can access their vendor page by clicking See live products.