Appearance
Vendor Page
Marketplaces build trust thanks to their vendors. For this, we have made a vendor page that enables the marketplace to create a dedicated collection page for each vendor.
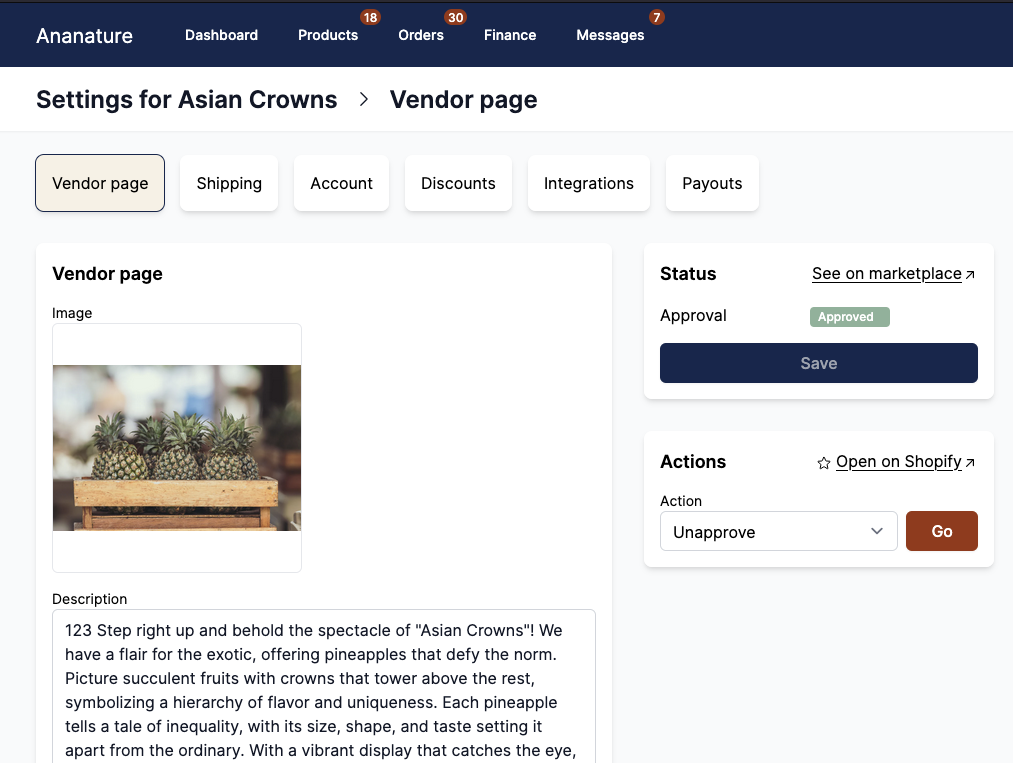
Enable and configure the vendor page
The vendor page can be enabled by the marketplace in Admin panel > Features > Enable vendor page.
The vendor's page fields can be configured in Admin panel > Vendor fields, look at our dedicated section to learn more about it: Vendor fields.
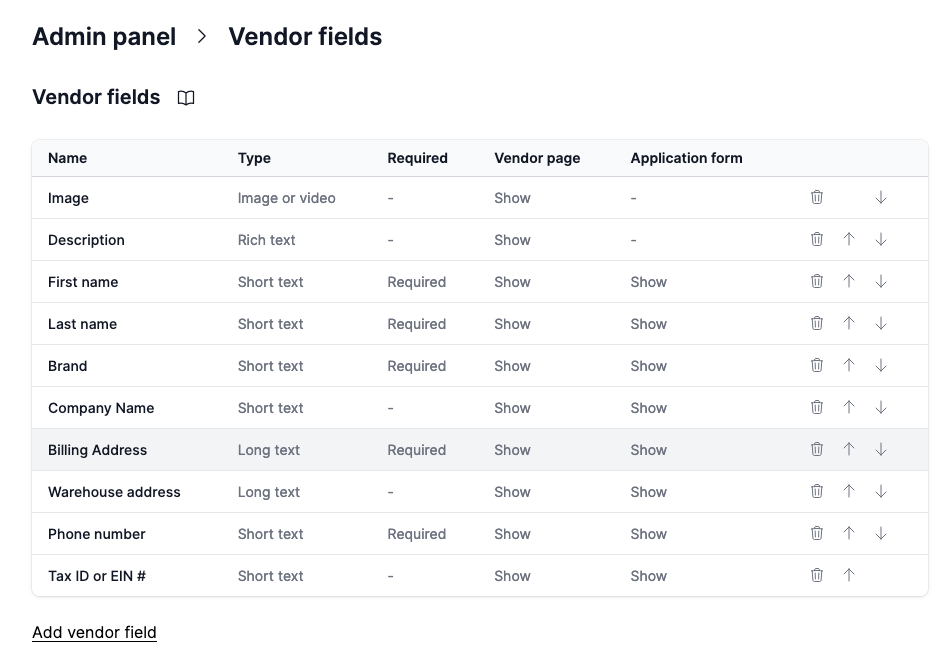
Display fields on the vendor page
All fields present on the vendor page can be used in Shopify's theme editor, either in liquid or with the interface widget.
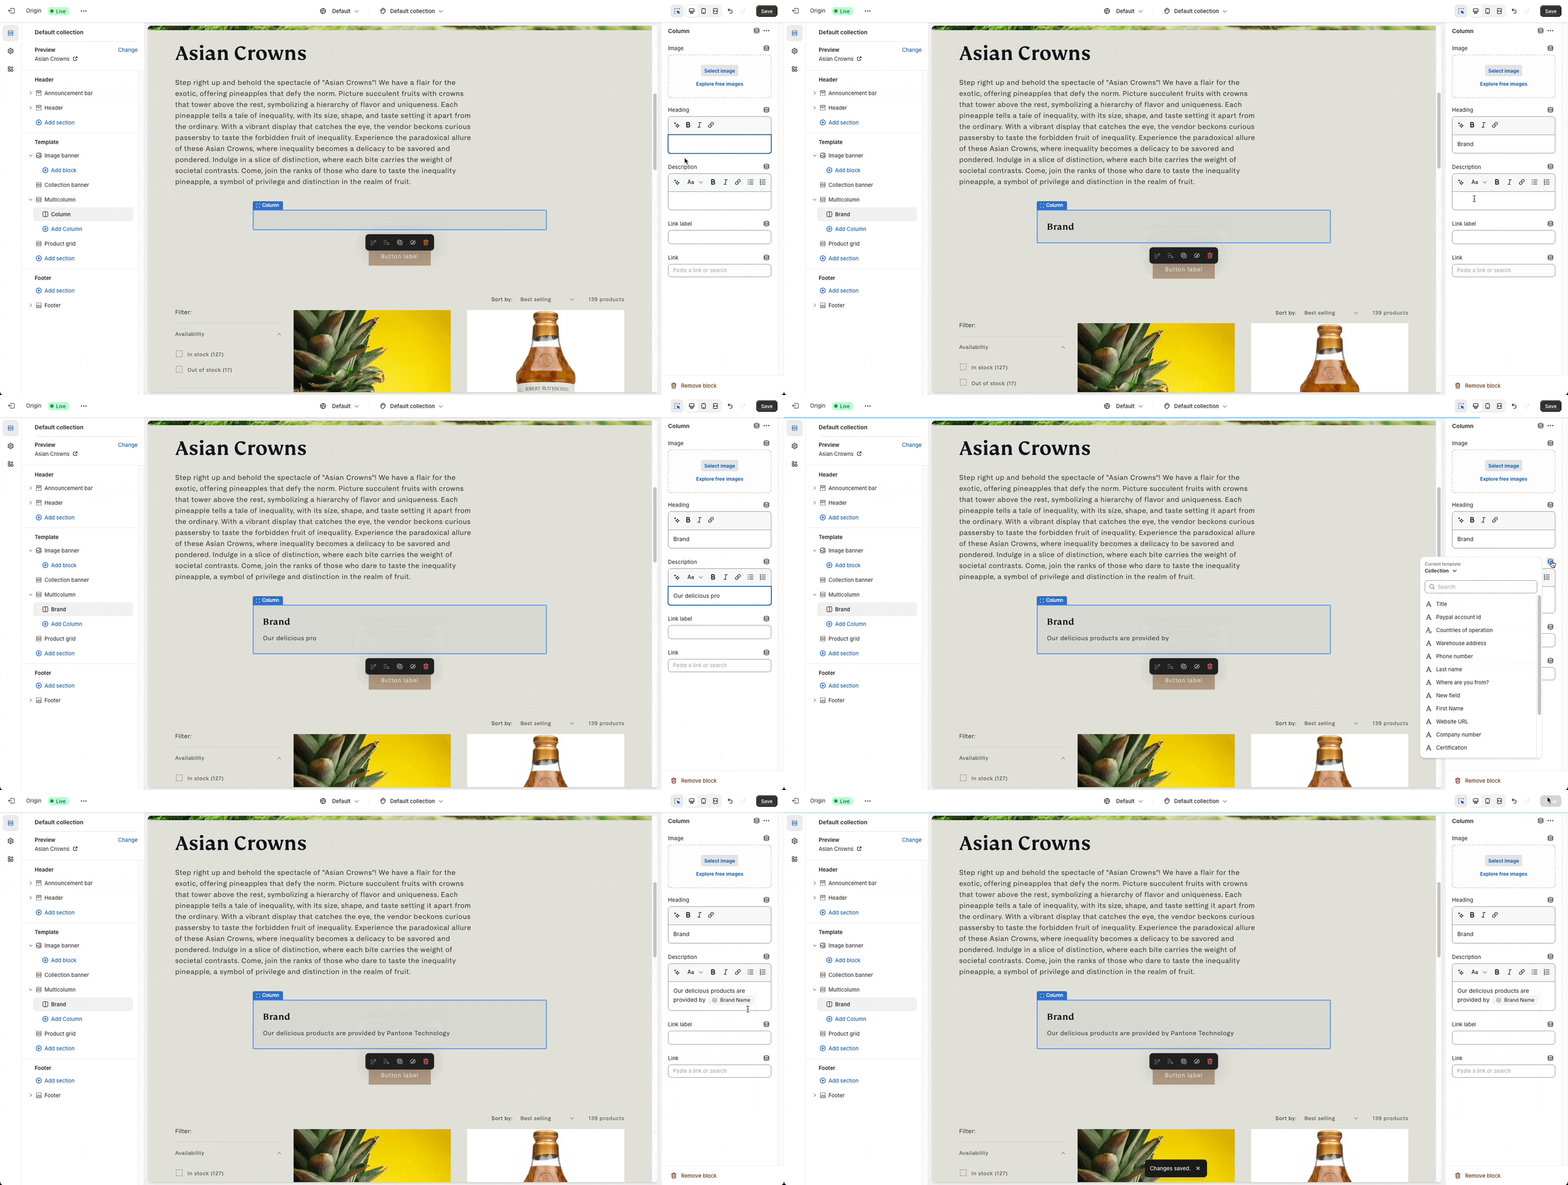
Technically, the fields filled by the vendor will be available as metafields in the storefront.
Available fields
The fields displayed on the vendor page can be configured in the Registration Field section. The vendor will need to fill all fields marked as Required to complete their profile.
Approval step
It is the same process as with products - the vendor submits the first draft to the marketplace. Once live, the vendor is free to make any changes they wish.
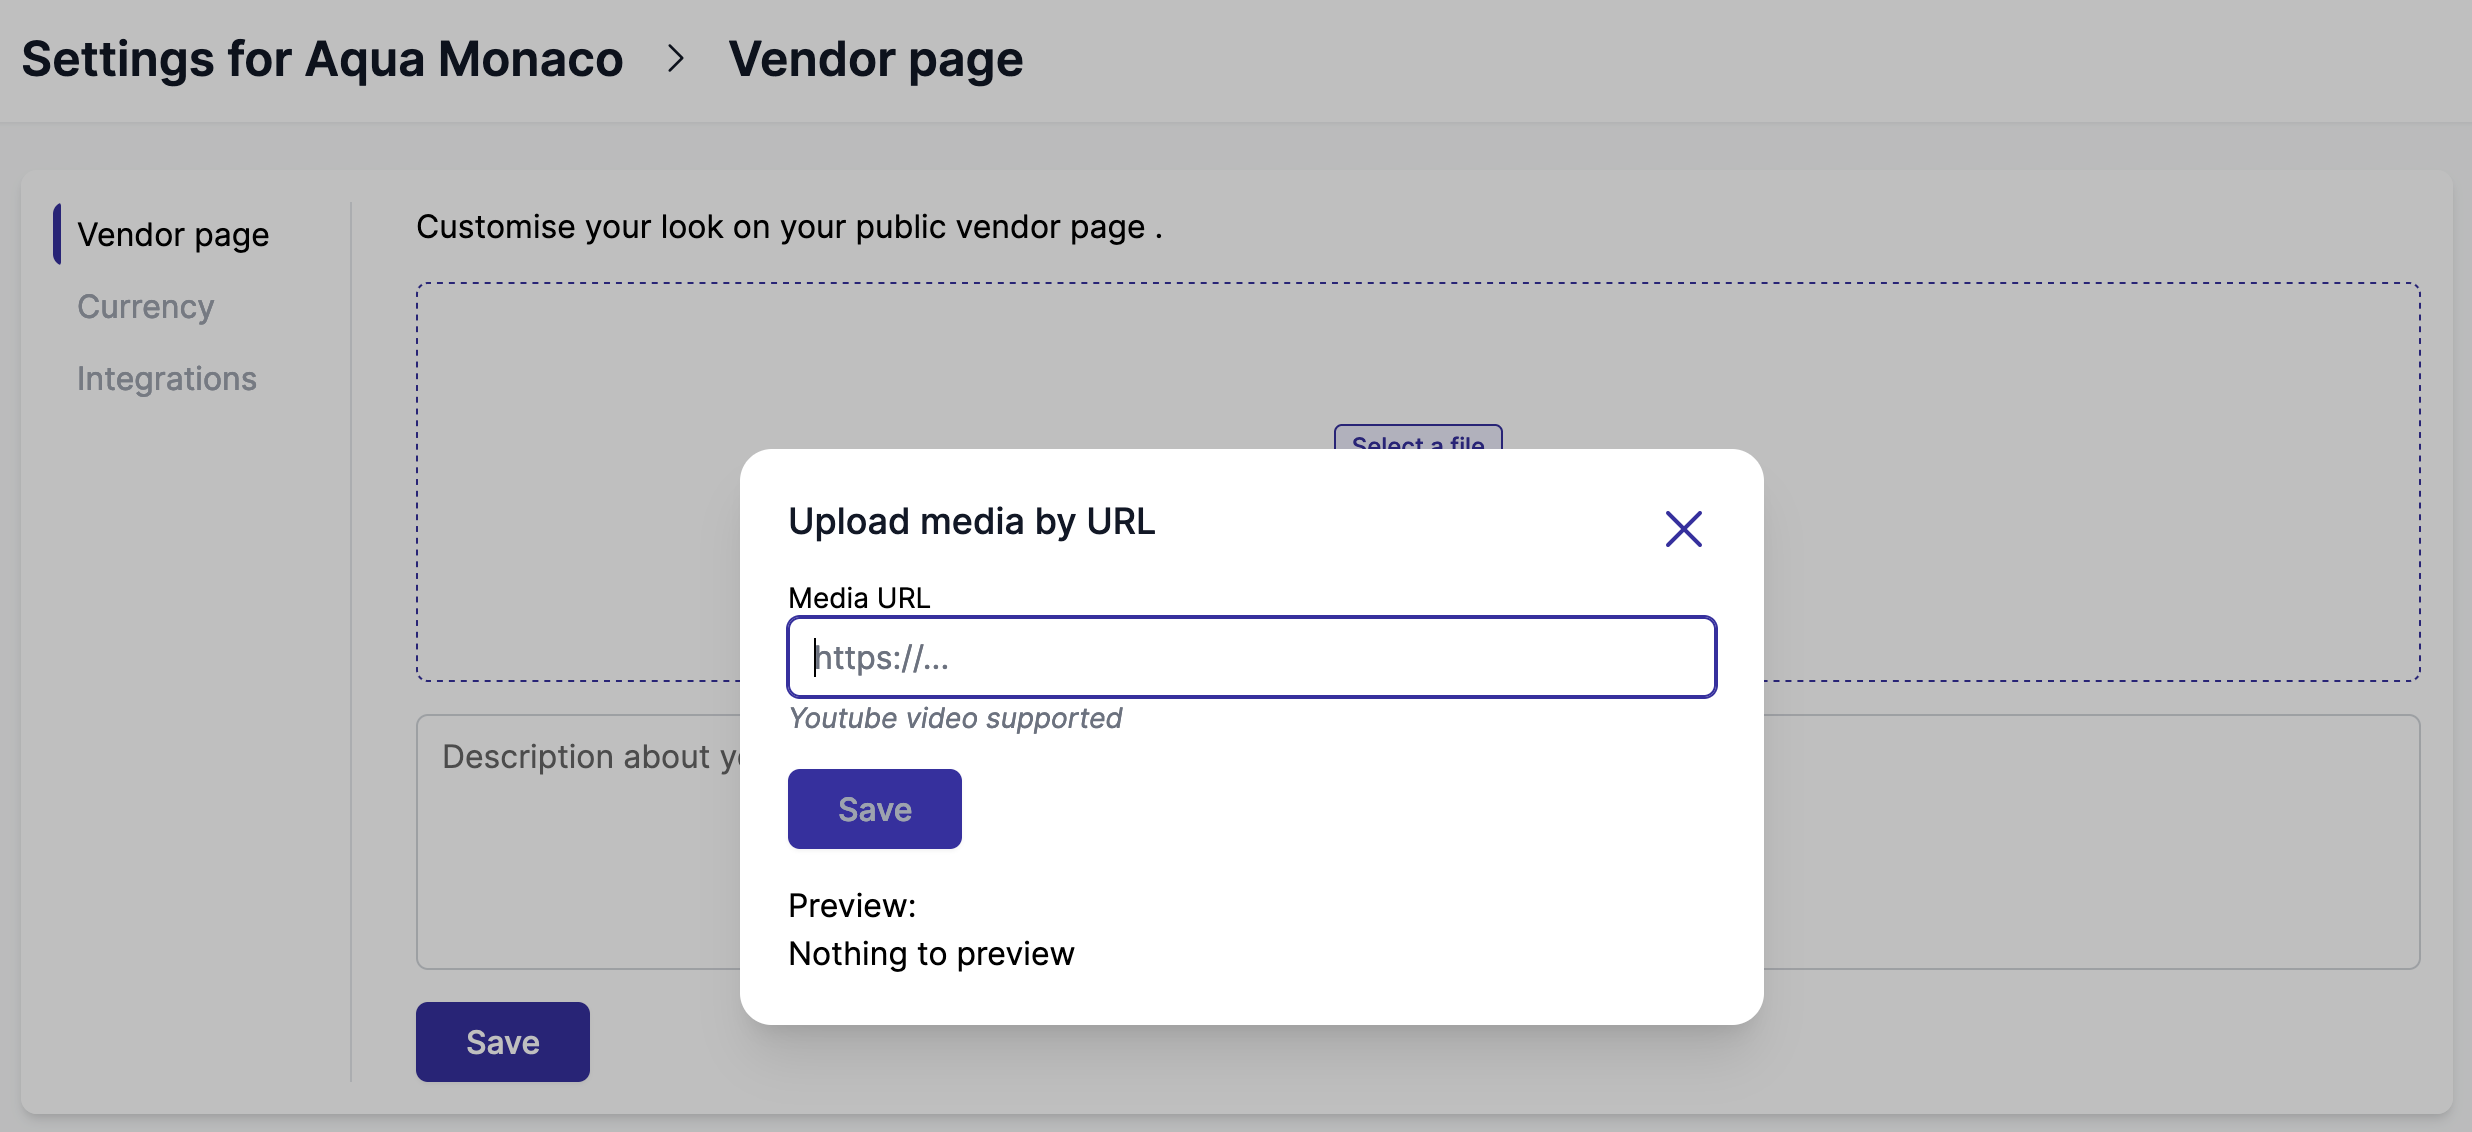
Upload a youtube video
Vendors can also upload a youtube video instead of a photo. They will natively be displayed in Shopify.
Customize vendor's page design
The marketplace might want to customize the vendor page design. In Shopify, a vendor page is a collection.
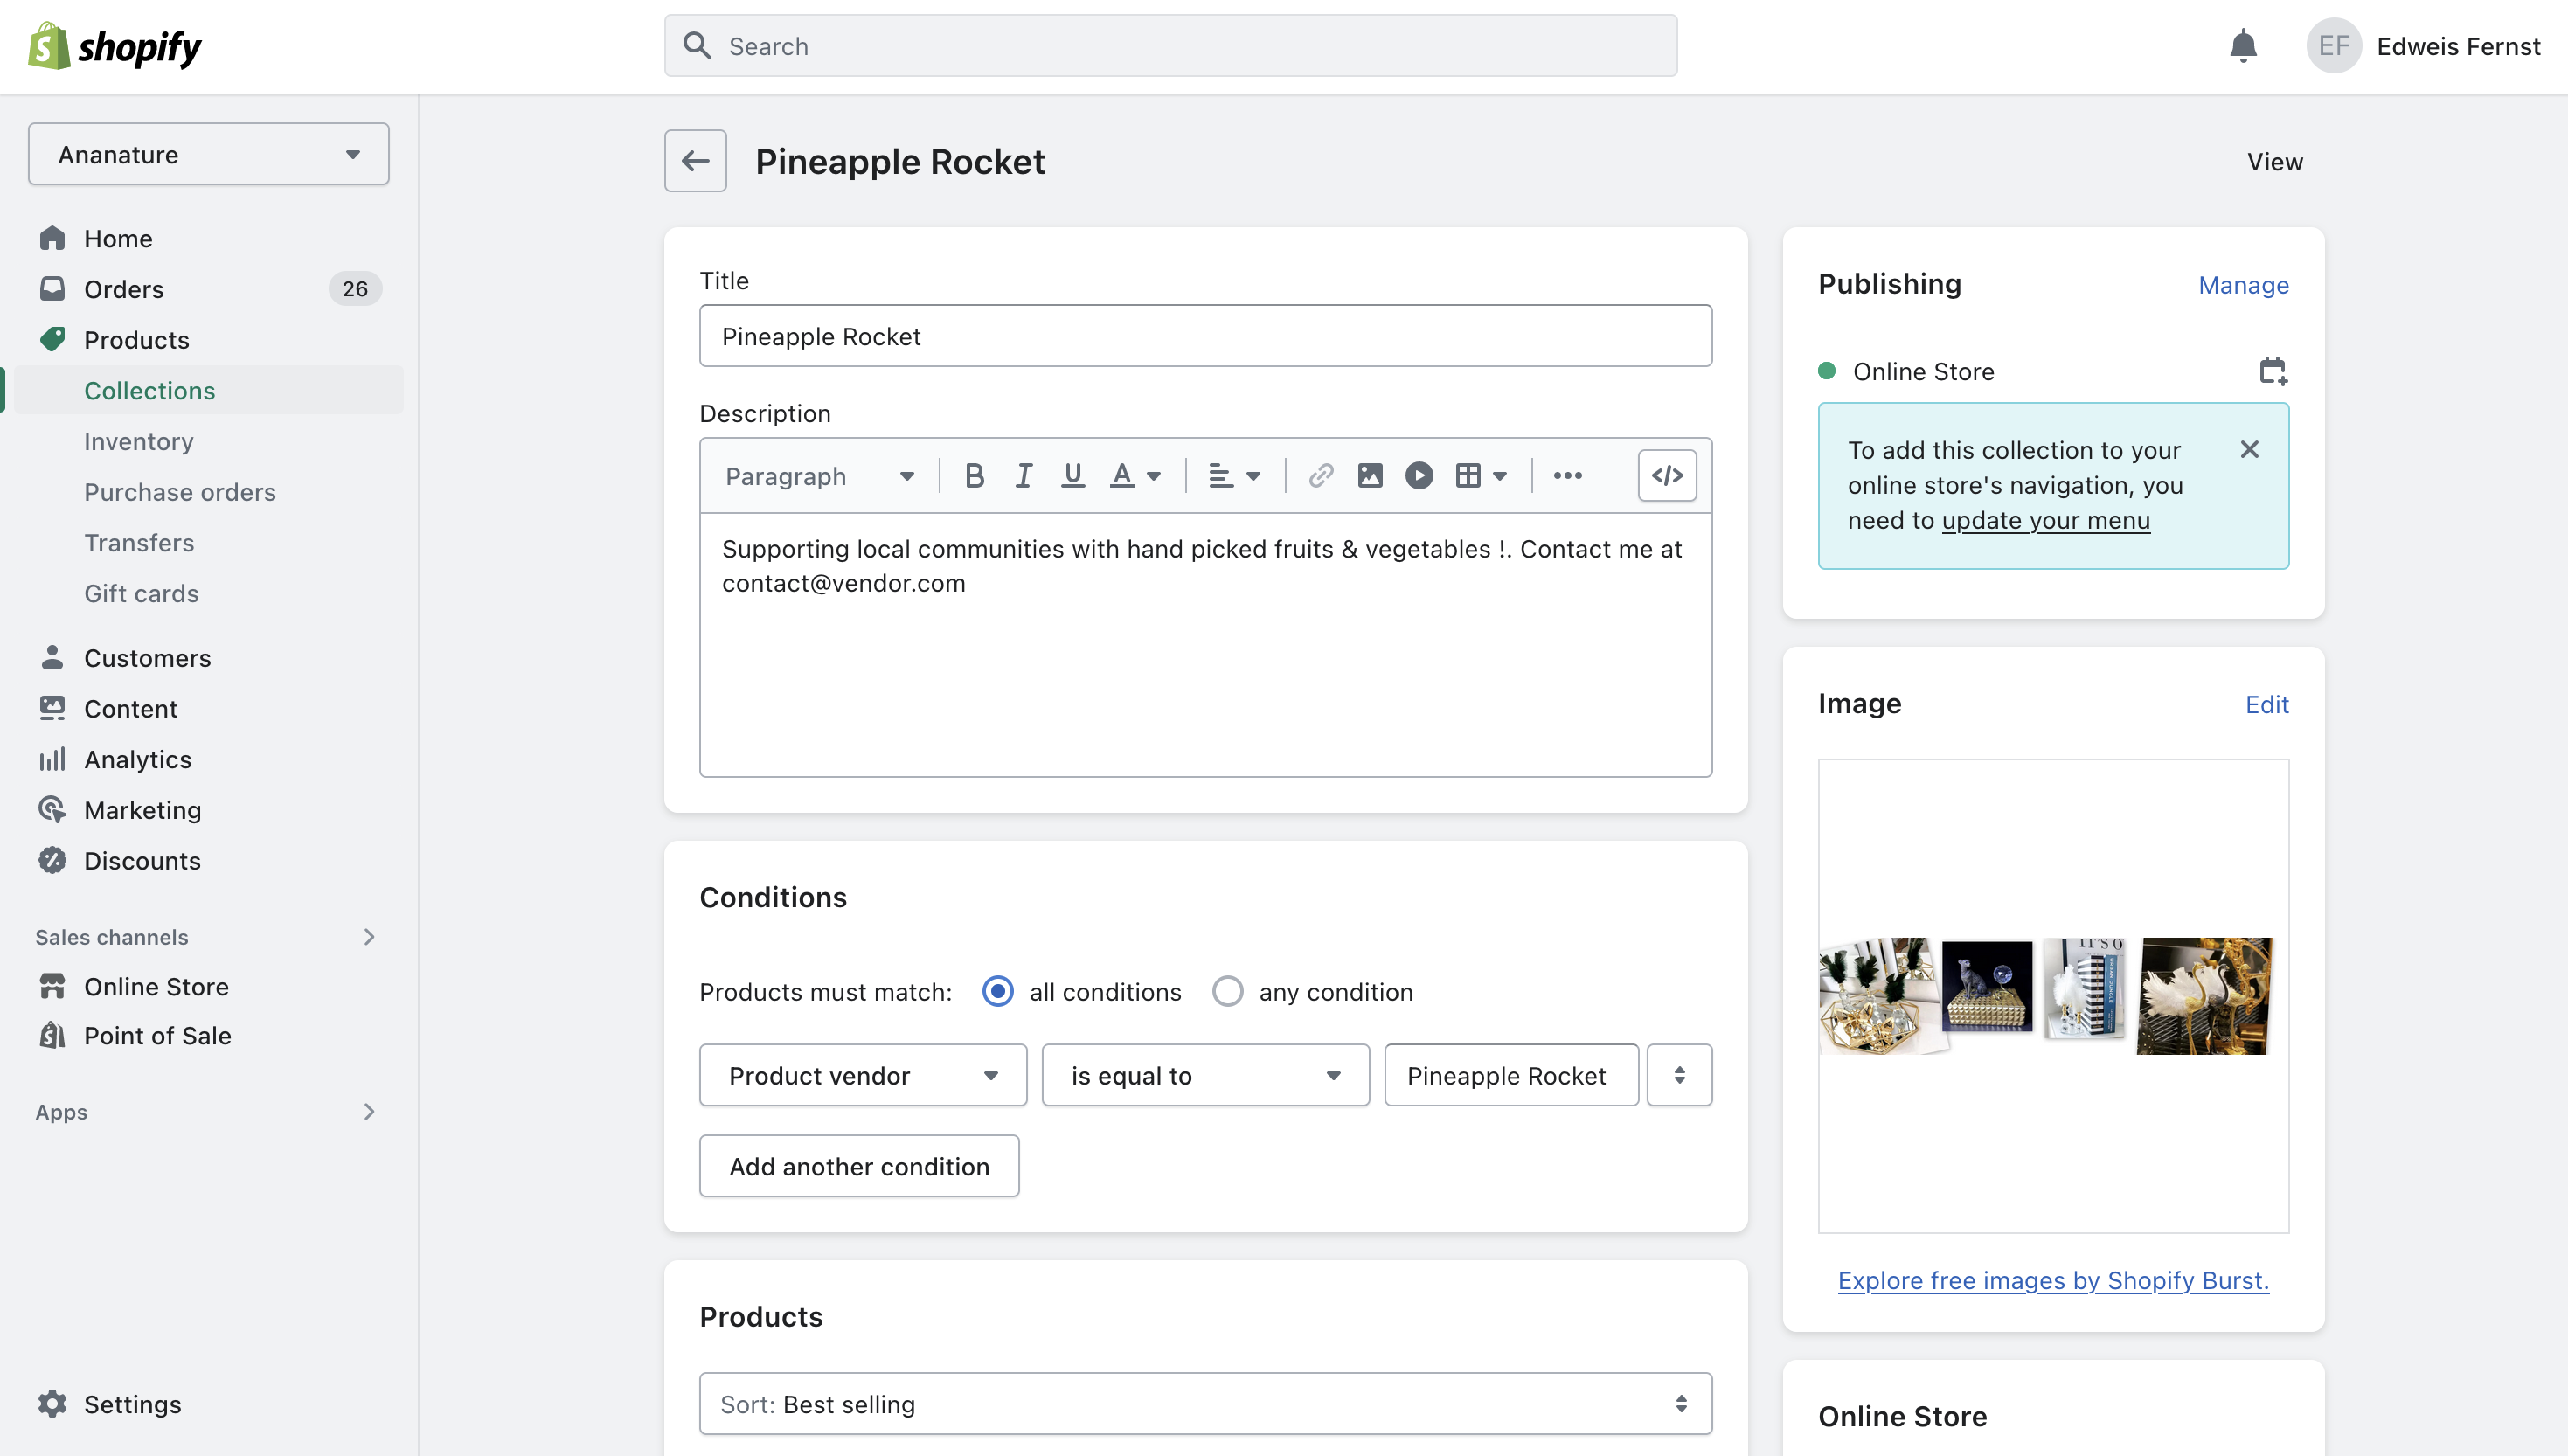
Products are sorted by best selling first.
Collection template
Garnet uses the default collection template. Contact us to set a custom template instead.
SEO
Vendor pages are SEO-friendly, Garnet sets the page SEO title and SEO description. You can customize the SEO by editing the collection template linked to the vendor pages.